After purchasing the middle-aged person's good charger in May, I took advantage of the June 618 event and started tinkering with a NAS. (Actually, there's also a software router, but a software router is not suitable for sharing on the internal network, so let me share the process of DIY NAS first. For someone like me, the process can be quite arduous. Of course, now that the configuration is complete, it's very enjoyable to use!
Configuration Selection#
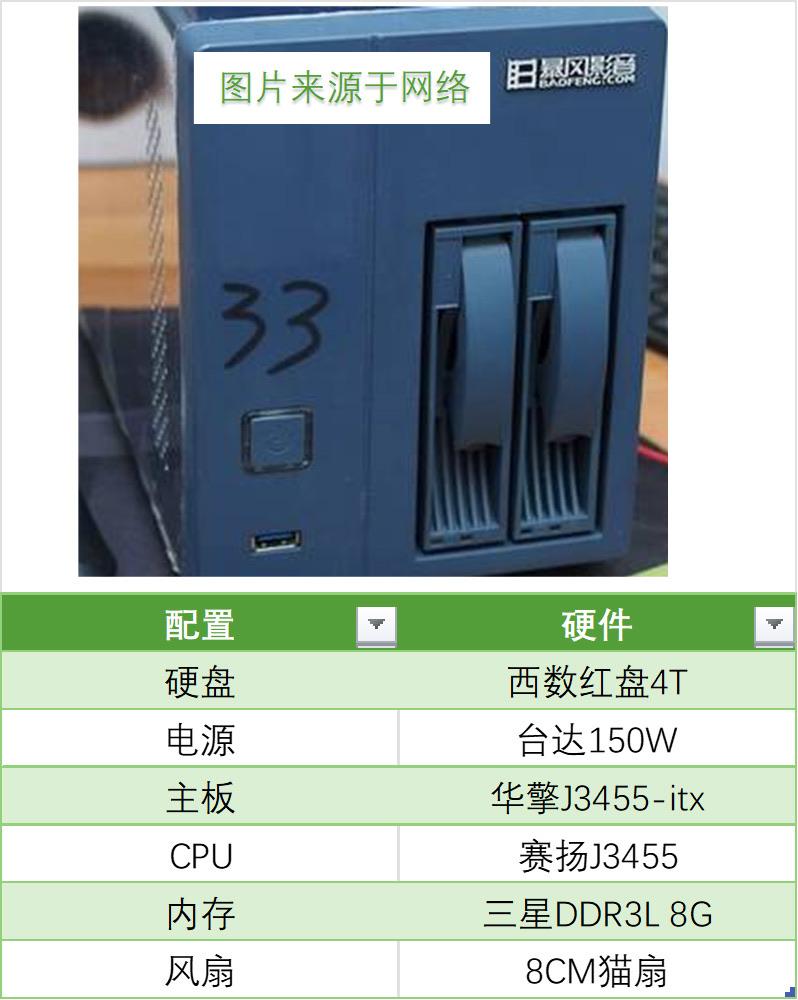
Since I want to DIY NAS, the first thing to do is to determine the list of components. Actually, I already have a "Storm Cool Play Cloud" that I bought on Idle Fish a while ago, and its configuration is as follows:
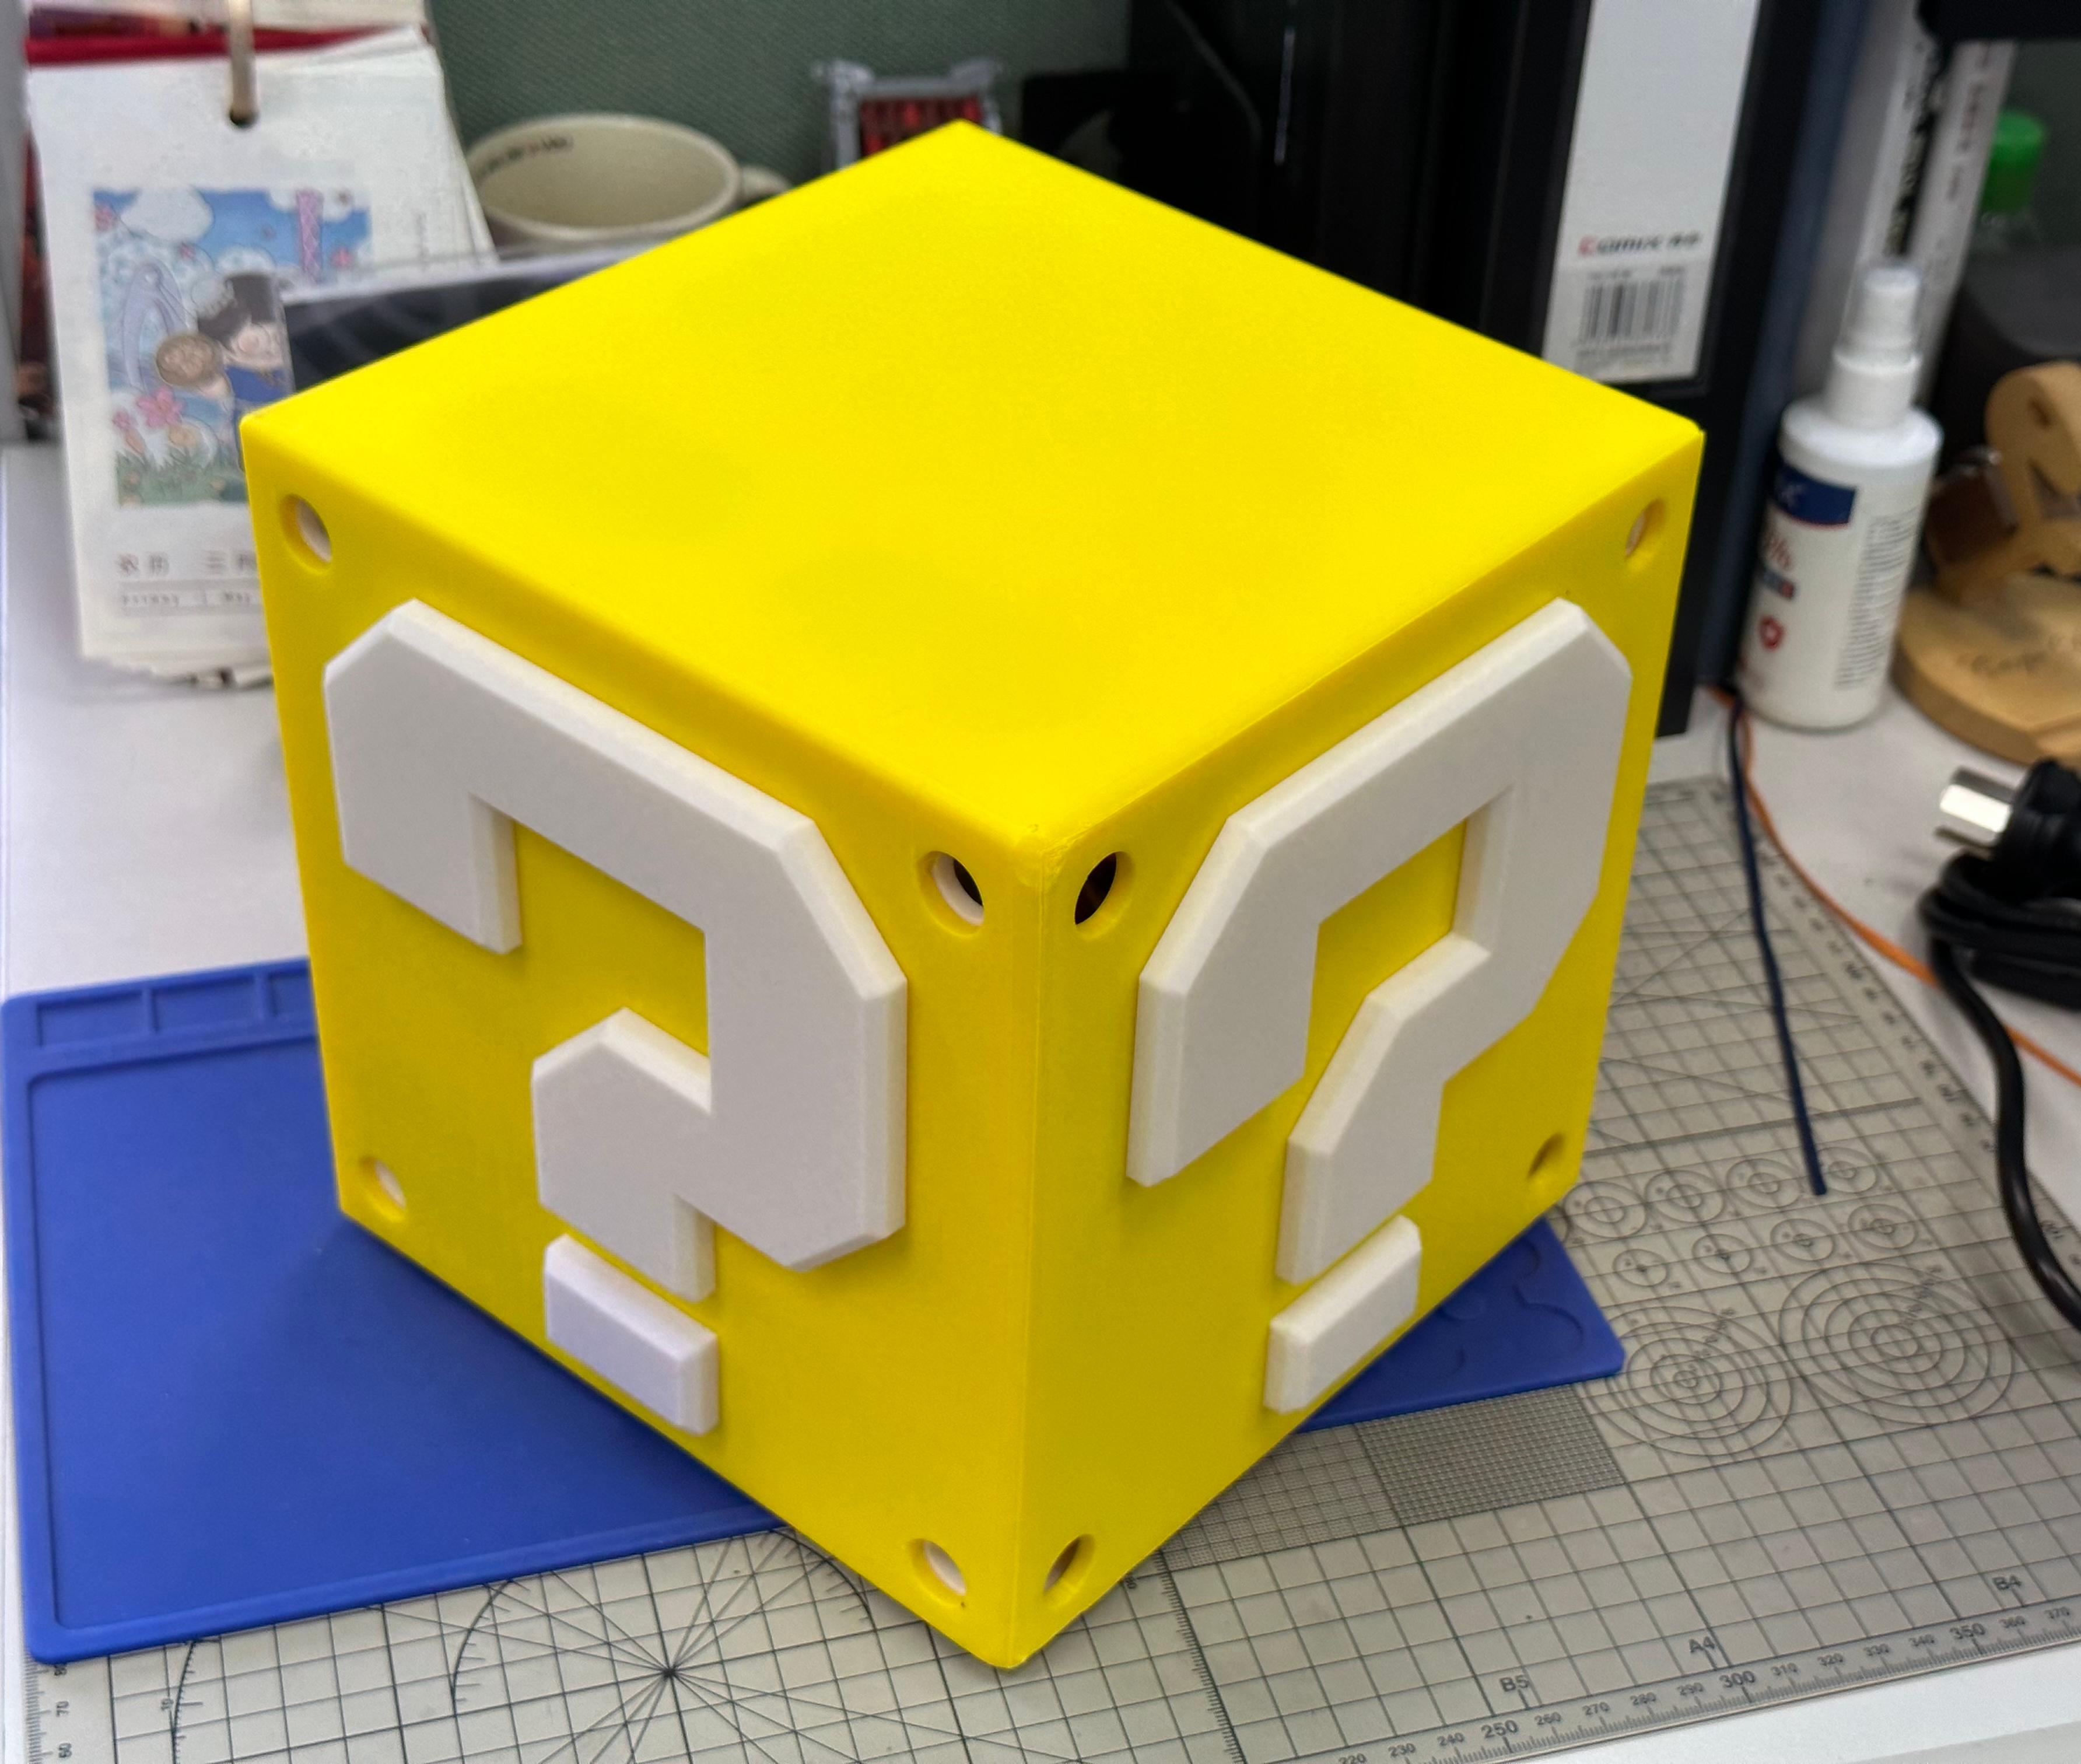
Actually, this configuration is fine to use, but I clearly felt that two drive bays were not enough during the previous usage, so I decided to go with a 4-bay setup for this DIY NAS. Of course, the reason I suddenly decided to DIY NAS was because I was bored and browsing Idle Fish, and suddenly I discovered Miao Da's open-source 4-bay Mario chassis solution on Bilibili. I fell in love at first sight and couldn't resist buying it...
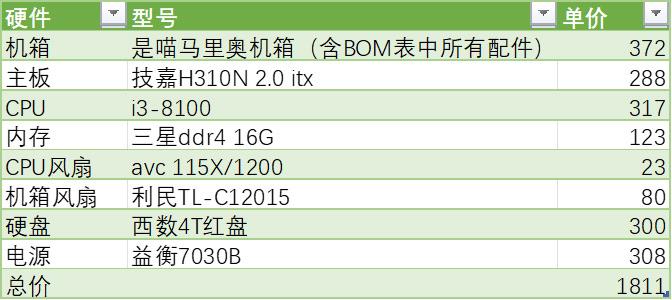
Since the chassis has been decided, the next step is to choose the motherboard, power supply, and other hardware to match the chassis. Considering that this is an upgrade, using J3455 would be a bit inadequate. No matter what, I have to upgrade the performance. However, I'm already used to Synology's operating system, and the native Moments app is really useful. So, considering the compatibility of the integrated graphics, I bought an i3-8100 CPU from Idle Fish as the core of the NAS. It perfectly balances performance, compatibility, and power consumption. Due to budget constraints, I bought the remaining hardware components from Idle Fish, except for the power supply and fans. Finally, my NAS configuration for this time is as follows:
Actually, I went on a shopping spree and only realized that the total price was already close to that of a finished NAS... But let's not dwell on that, I'm off to enjoy my durian now! /(ㄒ o ㄒ)/~~
Assembly#
The best part of DIY is the process itself, but this time the NAS is designed to be extremely compact. The gaps left in various positions are very small, so once the entire chassis is assembled, it becomes very tight. If there's a mistake during assembly, it's extremely painful to open the box. Below are the problems I encountered and the pitfalls I encountered during this assembly.
-
Backplate of the hard drive cage installed incorrectly
I want to emphasize this! Because of this mistake, I had to completely disassemble the entire computer and reassemble it! It's the green part in the picture below, it was installed upside down. I only realized after the entire assembly was complete that I couldn't connect the hard drives to the backplate correctly! I was devastated on the spot, ahhhh! Although the backplate power and SATA cables were already connected and organized. I had no choice but to disassemble everything!

-
Hard drive cage backplate too close to the chassis fan
Due to the extremely compact size of the chassis, when the hard drive cage is installed inside the shell, the distance between the hard drive backplate and the fan is too close. In addition, according to the airflow design requirements, the chassis fan needs to be installed in reverse, which causes interference between the two large 4-pin power cables, 4 SATA cables, and the chassis fan. As a result, when the NAS starts up, there is a clicking sound from the back. I had to remove everything and secure the cables again. I had to do it several times to ensure that the cables would not interfere with the fan.
-
Very small gaps in the chassis design
The entire NAS enclosure can be understood as a three-layer nested shell. The hard drive cage is enclosed in a white inner shell, and the inner shell is enclosed in a yellow outer shell. According to what Miao Da said in the group, the design gap is only 0.2mm... coupled with material shrinkage, you can imagine how painful it is to disassemble and assemble the entire shell. To describe the level of pain, it took me a full 20 minutes to remove the inner shell...
-
Step in the power connector position
I don't know if it's a problem with the precision of the 3D printing or the original design, but my Yiheng power connector couldn't be fixed properly on the inner shell because there's a step on the inner side of the shell that interferes with the power connector. Since I didn't have a file at hand during assembly, I had to install the power supply at an angle. Fortunately, it doesn't affect the use, but it bothers my perfectionism a bit.
Completion#
After experiencing and overcoming many hardships, the machine is finally up and running. Seeing the unique appearance of the DIY NAS and its incredibly quiet operation, all the hard work was worth it. The aspect of this NAS that I'm most satisfied with is its appearance. Considering that my lovely son was born this year, I always want to add interesting things to enrich his environment as he grows up! Compared to traditional bulky NAS devices, this Mario chassis is really good-looking! Once again, I want to thank Miao Da for designing such an interesting thing!